

I'm still working on this but also gathering feedback on it, so feel free to read as-is, but know that it's not done/totally fact-checked yet. I also have lots of diagrams I need to draw and add of course :D If you have feedback, ping me on Instagram.
I'm going to try to explain a kind of fast-and-loose McGyver-like understanding of electricity, the kind that used to exist in 1940's books that explained how to build your own radio and assumed you had a box of random parts lying around(but without that assumption). They also assumed that you didn't need to get precious and precise about it, that you could just muck about by mostly feel till you got something that worked. Optimization and efficiency was for proper electrical engineers. I think this is a good approach for many—if you start here and get over an initial sense of intimidation, you can later get into fine tuning if you want to. (If you are in fact an electrical engineer, reading this may make you want to tear your hair out. Sorry!) We are surrounded by electronics, but to many of us, it's alien magic. This approach is intended to make it more familiar and comfortable, like making stuff with scissors and tape.
DISCLAIMER: If you get hurt doing anything related to what I wrote here, that's on you. Have common sense. Don't stick things into the electrical sockets in your walls, etc. That can kill you.
Hands on
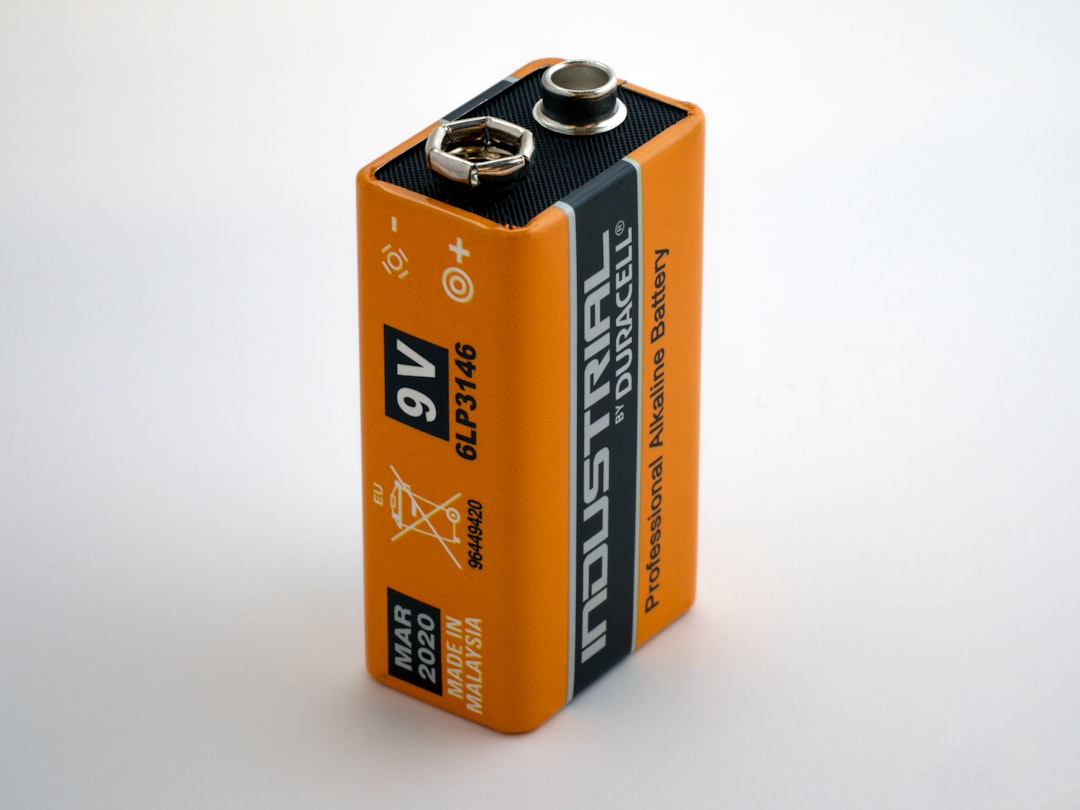
First, let's touch some electricity. It's hard to understand what you can't see or touch. Get a 9 volt battery from your local grocery store or kiosk. It's the one shaped like a block instead of a cylinder, with the two metal lego-like connectors at the top of it.
Take it out of its packaging and put your tongue on one of the connectors. Should taste like nothing or like metal. Now, (Note: this will hurt a tiny bit) briefly put your tongue on both connectors at the same time. Ow! What just happened?
An analogy
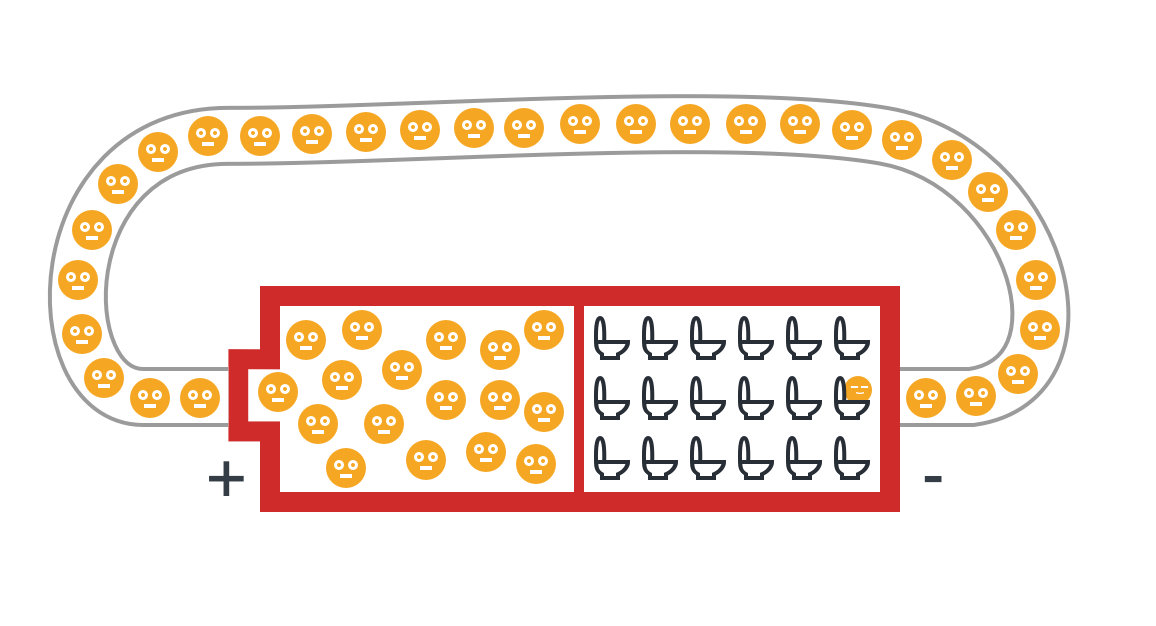
Notice the battery has two types of connectors, + and -. It says which is which right on the battery. Their shape doesn't matter (this is just to make it convenient to attach the battery to things), but every battery of every size and type has these.
Imagine that inside the battery there are two rooms. In one room (the MINUS room) there are a bunch of toilets:

In the PLUS room are a bunch of kids that really need to pee.
These kids are highly motivated to run towards the toilets as soon as a corridor opens which can take them there. Otherwise, they sit in the room and suffer and wait. (Lots of potential energy there. 9 volts of it, in fact.)
A moment ago, your tongue was that corridor. Those little kids ran out of their room, through the saliva on your tongue, and into the toilet room with great relief. They interacted with water molecules on the way and produced hyrdoxide ions, which leaves a sour taste. (some cool details on how you can get different tastes with different levels of current here)
But other things could be that corridor. Anything made of metal, really, like aluminum foil, or a nail, or a pencil lead (to some extent) or water (ideally with some salt/minerals in it), or a banana, or even your body if they need to pee badly enough. The kids in that 9V battery don't need to pee that badly. The ones in the plug in your wall though, need to pee BADLY. Like 220V worth, which is a lot of motivation to push through the resistance of the cells in your body and fry you from the inside as they aim for relief in the ground, which is the ultimate room of toilets. (they'd prefer to run through something metal, but you'll do in a pinch) So don't play with those kids till you really know what you're doing.
Meanwhile the kids in the 9V battery are pretty chill. The kids in the batteries you're probably most familiar with (the cylindrical AA and AAA ones) are even more chill at 1.5V each. The most common coin cells (the ones that look like coins) are often 3V. This is not going to hurt you.
The only thing that can happen is something called a short circuit. This is when you have a corridor of metal between the rooms that is thin (like a wire) with nothing else using up the energy of the kids pushing forward, and the corridor heats up so much that it can burn you.
For an example of this happening, get some steel wool and touch the 9V battery to it. Or just watch someone else do it:
So if you feel something heating up, remove a connection from at least one of the contacts of the battery and check what's going straight from PLUS to MINUS. (probably the section that was getting hot) The steel wool is burning because it's so very thin; the wires you use are going to be thicker so they won't get this hot this fast.
You probably didn't want to waste the energy of the kids on just heating up the wire anyway, right? Let's see what we can do with it.
Do something useful
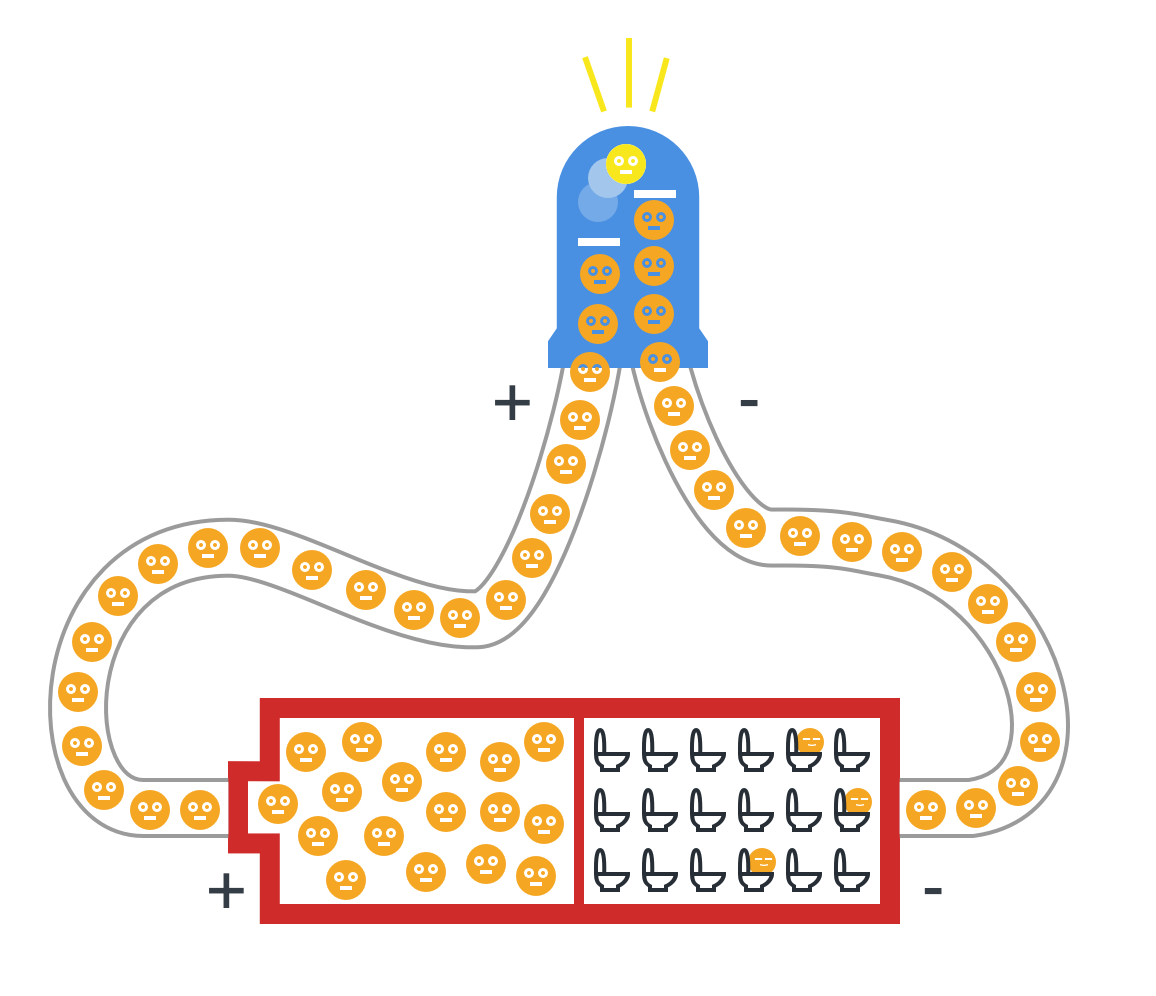
If you put something in the way of the kids so they have to run through it before they can reach the toilets, you can use their energy, as long as they know they WILL eventually reach the toilets. They're all in a long line in the corridor, and if at any point one of them has to stop, they all stop. If they can all move forward, they all move.
You want to make a connection from the PLUS to a THING to the MINUS in a nice unbroken loop. Some examples of THINGS:
- a motor
- a buzzer
- an LED (a light)
Each of these has two metal contact points, one to let the kids in, and another to let the kids out.
You can either buy these parts from an electronics hobbyist shop online (links at the end of this post) or just take an old toy apart that has lights and movement and/or makes an annoying eeee sound--they're all in there, and they usually still work just fine even if the toy itself doesn't anymore. Snip them off with pliers and leave their "legs" as long as possible so they're easier to handle. Those blinky swords and "wands" you sometimes get from amusement parks are a great source once their plastic housings inevitably crack.
The LED

LED stands for Light Emitting Diode. Diode means it's a weird bit of corridor with a one-way revolving door. Try to make the kids go in the wrong way and they won't be able to. (plain diodes that doesn't emit any light also exist, but more on those later perhaps) LEDs have a long(+) leg and a short(-) leg, and to make it work you need to attach the long leg to the PLUS room to let the kids in through there.
The easiest way to see this is to put an LED around a 3V coin cell, like so:

Play around with this. Flip the LED around, make the leg touch and not touch one of the contacts and see what happens. If you don't have the long leg on the PLUS side, it won't work. If both legs don't touch their respective contacts, it won't work (kids can't get to toilets). If one of the legs touches the plus and minus sides at the same time, it'll get warm/hot.
Once the kids get in, there's a step for them to jump up to. Each one that jumps up releases a tiny burst of light. (Yes, this means that the LED lights around you are actually flashing really fast, faster than your eye can see! There are fun ways to detect this that I'll maybe get to later...)
However, if the kids don't need to pee badly enough, they won't have the motivation to jump up, and the LED won't emit light. Likewise, if there are too many of them at once jumping too hard, they can break the step and burn out the LED.
Controlling the corridor
When you open and close the loop to the battery, you can see the LED turns on and off. What else does this?
A button.
There's nothing magic about a button. It's just something that makes two bits of metal touch or not touch. It's entirely mechanical. When you push down, you're pushing down a kind of metal "bridge" that connects two separate metal bits. Then the kids can run across it. Let go, and the metal pieces are separate again.
A button has two bits of metal sticking out of it, one for the kids to run into, and one for the kids to run back out of when the "bridge" is down for them to run across.
A switch.
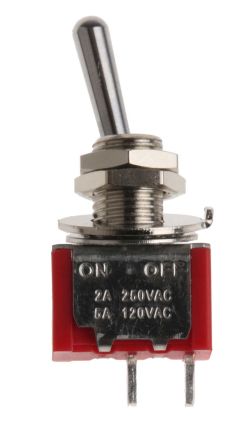
This does the same as a button on the inside; it's just a different mechanic on the outside. Some switches have more than one metal connector so you can turn one thing off while turning another on, or turn both off.
A resistor.
What if we want an LED to shine a bit dimmer than full-on?

Resistors make the corridor the kids are running through more narrow, so they have to go through, say, two at a time instead of ten abreast. Making the corridor narrow is adding resistance.
Resistors come in various levels of resistance, which are indicated by their colored bars, each of which represents a number so you can tell one resistor's resistance from another's. Google "resistor color codes" to find out more about these, (there's even a game around learning them) but for our purposes you probably only need three or four different "strengths" which you can then attach in-line one after another to increase their effects. This is where you can experiment. Put different resistors in an LED circuit and see how it affects the brightness of the light, and that should give you a sense of how strong each one is.
Don't worry about breaking stuff. These components are cheap, and if you're doing this with a 3V coin cell nothing's going to break in any case.
The number of kids going through the corridor per second is the current. You can now imagine that if they're not very motivated to pee (low voltage) they won't be pushing quite so hard, so they won't go through very fast, and you'll have low current. But if you have low voltage and a nice wide corridor with low resistance, you'll increase the current. You may have seen this before:
I = V/R, or Current = Voltage divided by Resistance
That I above is confusing (why isn't it C for Current?), and you can blame the French for that. It stands for intensité de courant, or Intensity of current. Thanks a lot, French people.
You can also think of it like this:
Number of kids through the corridor per second = motivation/width of corridor
I guess you could also think of it as how intense the throng of desperate kids is at a certain part of the circuit. How many of them are milling around there and at what speed?
Having said all that, you won't need this to just mess around a bit, but if things start going wrong and something isn't working you can find out why by keeping the above in mind. Each component you add to a circuit (a collection of parts attached with wires to a power source like a battery) has a range of how many kids it wants running through it at once. Too little and it won't work. Too much and it will break.
The tool to measure voltage, resistance and current is called a multimeter, but again, you don't need to worry about it if that feels overwhelming at the moment.

So let's get back to your LED and battery set-up. If you put a resistor between the battery and the LED, the LED will be a bit less bright because fewer kids are running through it per second.
Keeping things together
At this point you may have found that holding things together with your fingers is a pain. You can use a breadboard to keep things connected, or soldering (melting a blob of metal with a low melting point over two wires to connect them) but what I recommend is either just twisting the legs of components together if the legs are long enough, or using copper tape, or both.
[pic of breadboard, soldering, twisting, and copper tape will be added here]
Some components have very short legs and are a bit of a pain without a breadboard, but you can also find small alligator clips to attach to those. The main thing is to make sure metal touches metal in some significant fashion. Copper tape is nice for this because it's easy like tape and it adds metal to the connection, which means more material for the kids to run through.
Getting fancy
By now you probably have it in your head that to make electricity do something it needs to go in a loop from one end of the power source to the other, and then you'll want to put things in the way of the running kids. One type of thing is an output(an LED, a buzzer, a motor, something that does something), and another type of thing is something that controls the kids themselves (a button, a resistor, a switch).
Here's a formula that works:
[+] ———[control]———[output]———[-]
[+]———[switch]———[LED]———[-]
[+]———[resistor]———[motor]———[-]
[+]———[switch]—[resistor]———[motor]———[-]
Now all you need to make a bunch of different things is to know what parts are out there, and maybe some of their quirks.
Potentiometer (dimming)

Sometimes you want to control how things fade, like the brightness of a light or the volume or pitch of a sound. Potentiometers are the knobs or sliders that you often find on audio equipment or dimmers on walls. What they do is split the corridor between two exits. This is why they have three legs instead of two. The two corridors share the middle leg and turning the knob lets more kids out one leg and less out the other.
Knob all the way left: 100% left leg, 0% right
Knob a bit left: 75% left leg, 25% right
Knob middle: 50% left leg, 50% right
If you attach an LED to each leg and turn the knob right and left, one LED will dim as the other gets brighter and vice versa.
If you just use two of the legs (middle and one of the side ones) and ignore the third, you simply control that one corridor, and let zero-to-all kids through it.
Now it might also be clear why "turning the volume up to eleven" just means "let all the kids run free".
Tilt switch (falling over)
[tilt switch pic]
Buttons are useful, but the tilt switch connects two metal bits by having a metal ball inside a cylinder roll over and touch both of them. In other words, it's a button that activates when you tilt it. For example, you could make an alarm which buzzes if a block is knocked over when someone opens the door.
Reed switch (magnets)
[reed switch pic]
Reed switches are made of glass tubes, so if you look into one with a magnifying glass you should be able to see two flat metal wires almost touching inside. If you bring a magnet near, they stick together, and the kids can run across. If you put a magnet at the end of a chopstick, and hide a reed switch controlled circuit in a toy, you can make the toy respond to a "magic" wand.
More things that do things
Motor (movement)
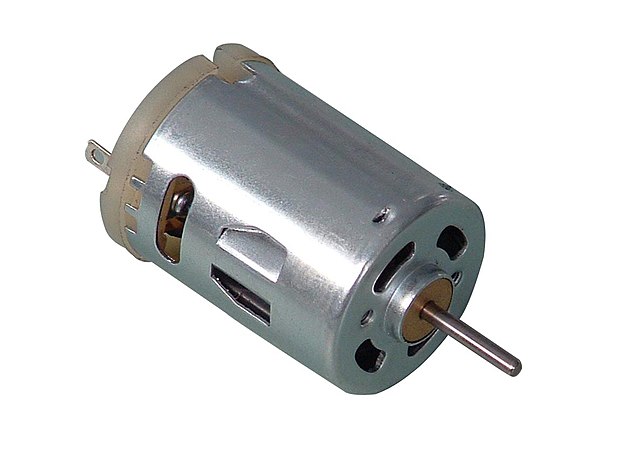
Motors are easy to use: they have two legs, and you can make the motor turn in one direction by having the kids run in one way and out the other, or flip PLUS and MINUS and have the direction of the motor flip accordingly. You can imagine it as a treadmill that the kids keep going as they run across it.
Motors have another use though: If you don't have a battery, if you turn a motor mechanically, it produces electricity. It pushes kids down the wire.
You have to turn the motor pretty fast though to light an LED, but you can make this more efficient by adding some gears. This is how those emergency hand-crank run flashlights work.
Buzzer (sound)
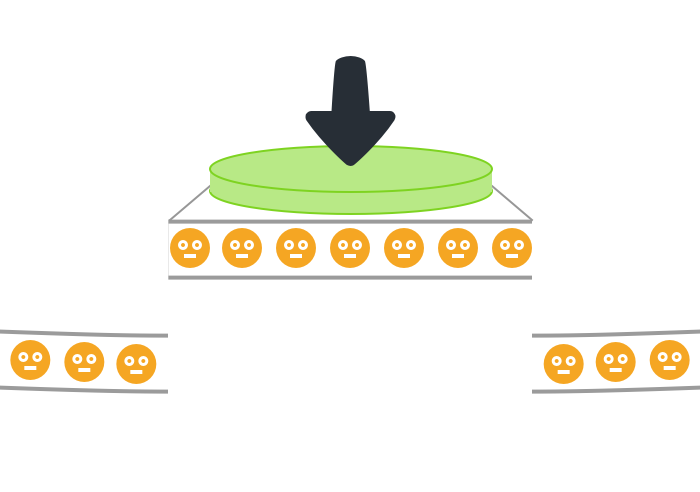
That eeeeee sound you get from cheap alarms and the like comes from a piezo buzzer, which is just an element that vibrates when you put electricity through it, generating waves in the air that our ear interprets as sound.
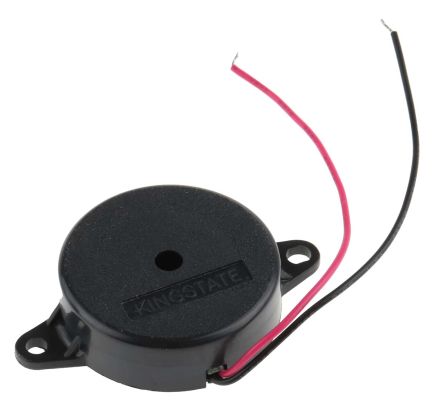
The sound pitches higher or lower depending how much electricity you run through it. You can also use it backwards, as a vibration/tap sensor, because it generates a tiny bit of electricity with each movement. Yes, this makes it also possible to harvest energy from vibrations with it, like so:
Useful links for further study
Another metaphor to explain voltage: https://learn.sparkfun.com/tutorials/what-is-a-circuit